Easy Wholemeal Bread
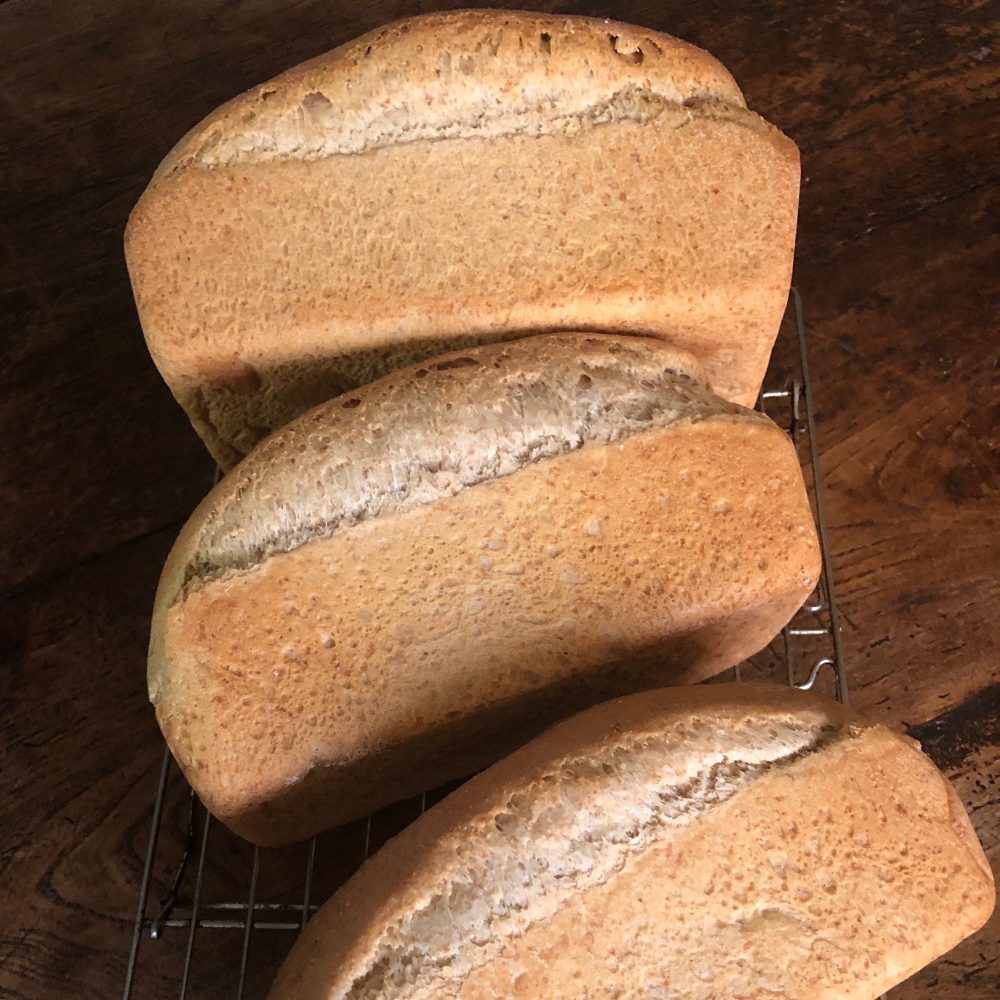
Being a great advocate of the homemade bread, this recipe I believe is a real winner. Extremely easy and simple to make as very few ingredients. The recipe here is using wholemeal flour, however, it works just as well with white and even with a mix of wholemeal and white (the end result being a much lighter loaf – see image of the stack of loaves).
I use coconut sugar in my bread baking but adding standard sugar works and if you prefer to use honey, go ahead but expect the final baked taste to slightly alter from a loaf made with plain sugar. I also give a variable on the amount of water to add as all flours vary in absorption, so add only 400ml first and then add more if you need. If the dough becomes too wet to handle, add more flour until you have a pliable and manageable dough. Finally measure your yeast accurately as you do not want the aroma and taste to overwhelm your final baked loaf.
The quantity of this bake fits approximately ONE large 900g oblong loaf tin or TWO x 450g medium oblong tins. Please note bread loaf tins vary so these sizes are only guidelines. Please note bread loaf tins vary so these sizes are only guidelines.
Ingredients
-
Dry:
-
525g wholemeal flour
-
170g semolina
-
7g fast action dried yeast
-
1 tbsp sugar- or honey
-
Wet:
-
400-500mls warm water
-
4 tbsp olive oil- or any oil alternative
Instructions
-
Make dough:
-
01 In a large bowl add all DRY ingredients. Mix well.
-
02 Make a well in the centre and add all WET ingredients (add the honey now if using honey rather than sugar). Mix to form a soft pliable dough. As all flours vary, add 400mls first, and if the dough to dry add more water, and if too wet a touch of more flour until you have a pliable dough.
-
03 Turn out onto a lightly floured surface and knead for up to 5 minutes OR if you prefer, turn out onto a lightly oiled surface and knead with lightly oiled hands. I prefer this method if my dough is the perfect texture i.e not sticky and pliable.
-
First prove (long):
-
04 Place dough into a lightly oiled large bowl, cover with cling film and leave in a warm place to PROVE i.e double is size. Can take from 1-2 hours depending on how warm the place is that the loaf is left to prove.
-
Shape:
-
05 Literally 'knock back' (push down) the dough with your finger tips and turn out onto a lightly floured board. Knead quickly for a few seconds, shape to fit the tin and place into the prepared lightly oiled baking tin.
-
Second prove (short):
-
06 Allow a further 15-20 minutes to start increasing in size and the dough fills all of the tin.
-
Bake:
-
07 After second rise, place in the hot oven and bake the bread until golden brown and to the stage when it gives a hollow sound when tapped with your finger tips. Remove from the oven. Turn out onto a cooling wrack and leave until cold.
-
Extra dry bake:
-
08 For an extra crusty loaf, remove from the tin and re-place in the oven for a final 'dry' bake of 5 minutes or so. This really makes sure the loaf is well cooked.
-
09 Eat immediately or store in cool place. For toast best to freeze pre-sliced and remove individually frozen to toast upon demand.
Notes
The quantity of this bake fits approximately ONE large 900g oblong loaf tin (about 21cm long, 11cm wide and 7cm high) or TWO x 450g medium oblong tins (approximately 6cm long, 11cm wide and 7cm high). For a lighter textured loaf alter the flour mix - take 450g wholemeal and 70g white flour (image of 3 loaves). Freezes superbly. Naturally, the making of the dough can all be done by a using the dough hook in a Kitchen Aid mixer. AMAZINGLY easy via this machine. Go from point 1-5, kneading in the machine for 3 minutes and turning out onto work surface for the first initial prove. Proceed as per the recipe afterwards. Finally, store as normal bread or freeze pre-sliced.


